Quick advice
Set up your child for safety with Windows 11 by doing these 3 things.
Get Microsoft Family
Use the Microsoft Family app to manage safety across devices, including Xbox.
Block content
Set up restrictions to content across search and web to minimise the chance of harm.
Manage screen time
Set general screen time limits as well as app-specific limits to help children balance their screen time.
How to set parental controls on Windows 11
You will need access to your child’s device with Windows 11 installed. You should also have your own Microsoft account before creating one for your child.
How to set up a child’s account
On shared devices with Windows 11, it’s a good idea to create separate accounts for different family members to help keep children safe online.
To set up a child’s account:
Step 1 – Sign in to the administrator account (or your account if you are the only user).
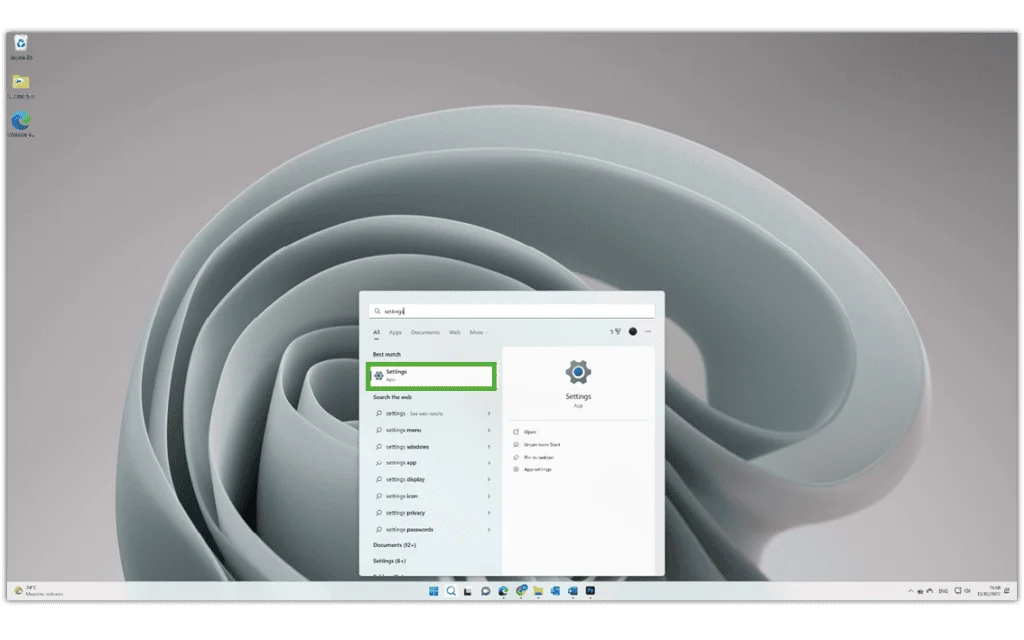
Step 2 – Search settings in the search bar in the bottom middle of the screen. Click Settings and then Account.
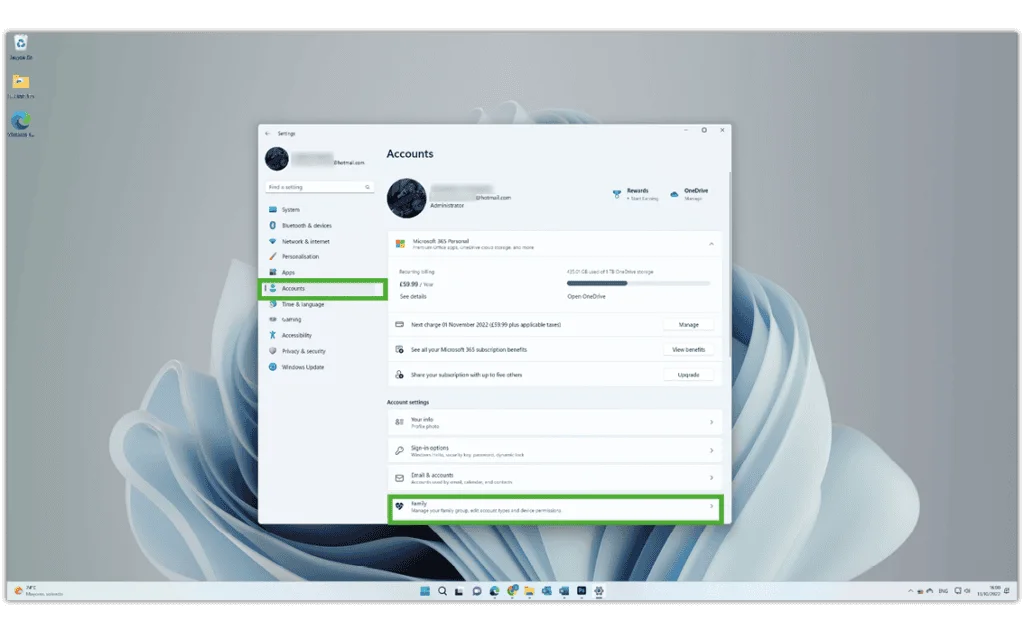
Step 3 – Click Family and then Add someone.

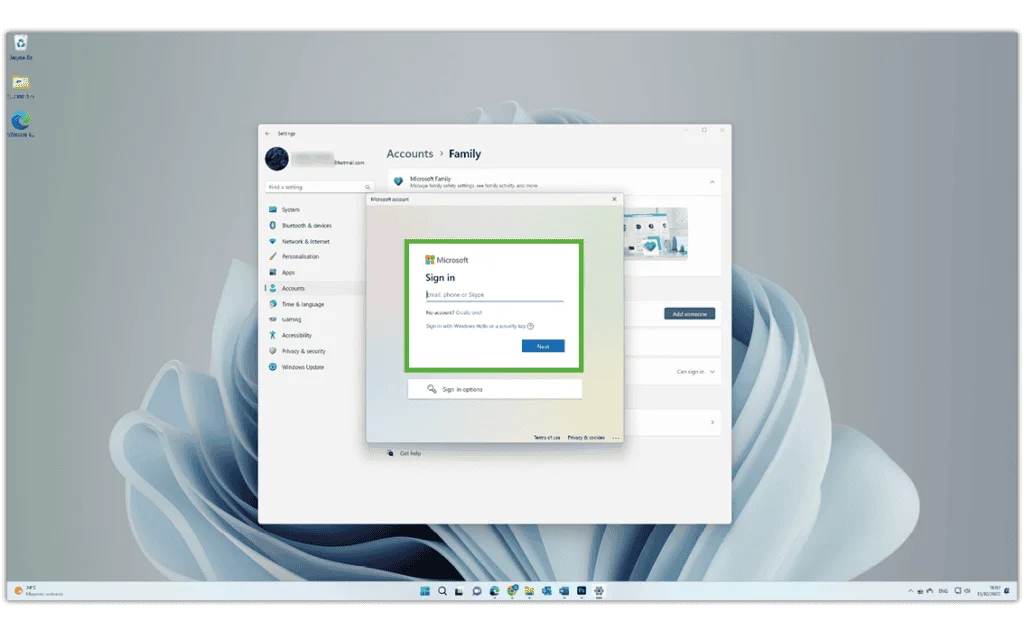
Step 4 – Create a Microsoft account email address for your child by clicking Create one for a child under the box and following the prompts (or enter one they already use). This should be a personal account rather than a school account. Once added, you will get a notification that they have joined your family.
Step 5 – Under Your family, confirm that your child has been added. Then, login to their account.
Step 6 – When you first sign in on your child’s account, there are additional steps to complete setup. From your account, click the Windows icon in the bottom centre point of the screen. Then, click your profile icon/name to select your child’s account.

Step 7 – Enter their username and password to confirm their account and approve the sign-in. Then, open Microsoft Edge to complete the first-time open tasks before returning to your own account.
Where to manage screen time
Windows 11 lets you track how much time your child spends on different apps. You can also set limits to help them balance their time online with offline activities.
To set screen time limits:
Step 1 – From your account, search family options in the centre menu search bar. Click Family options.
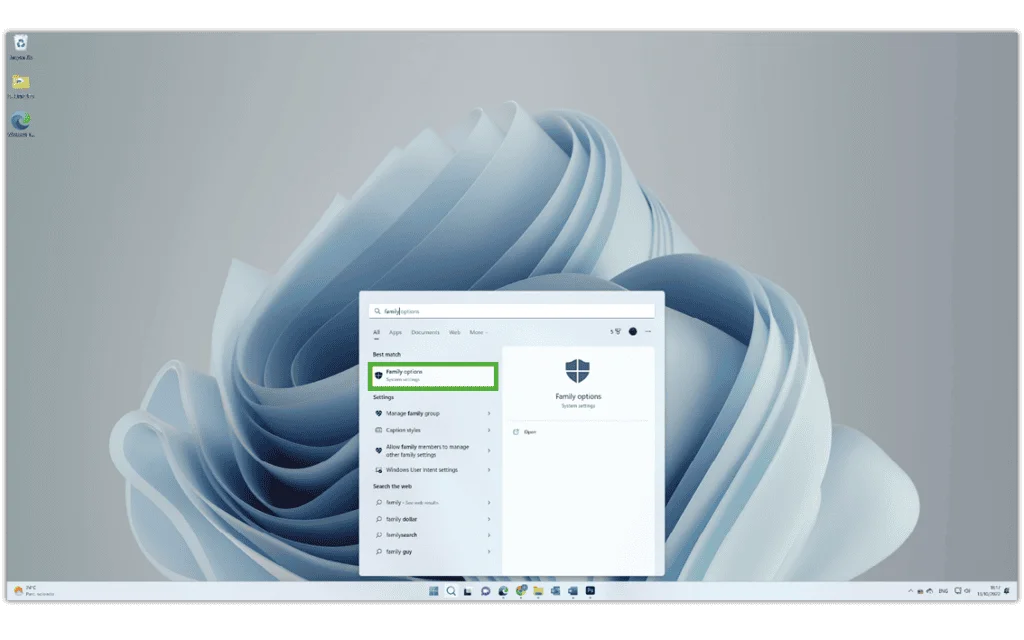
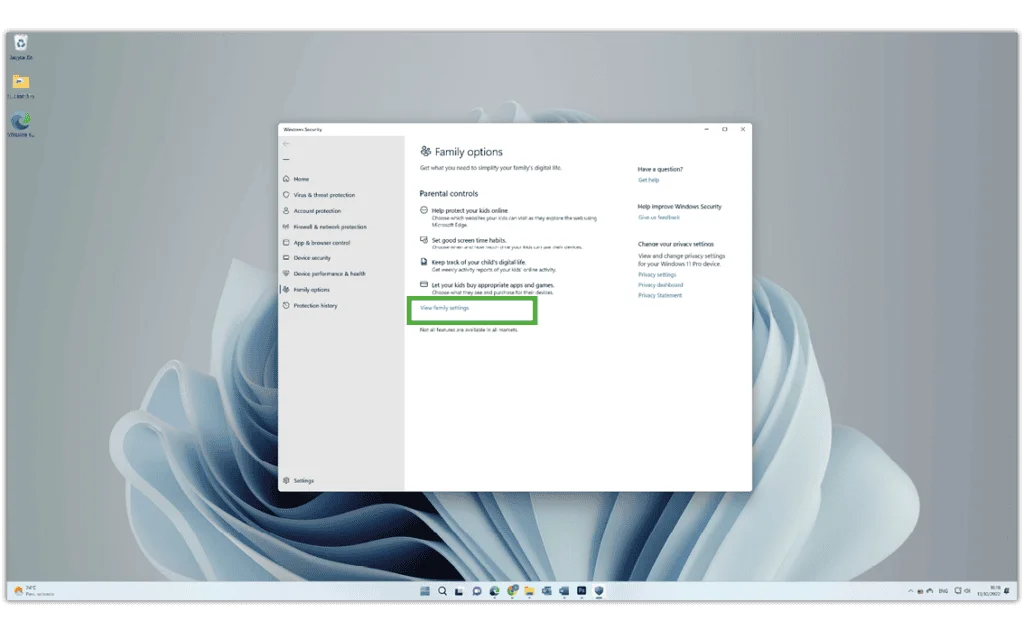
Step 2 – Click View family settings and click on your child’s profile. Click Screen time from the left-hand menu.
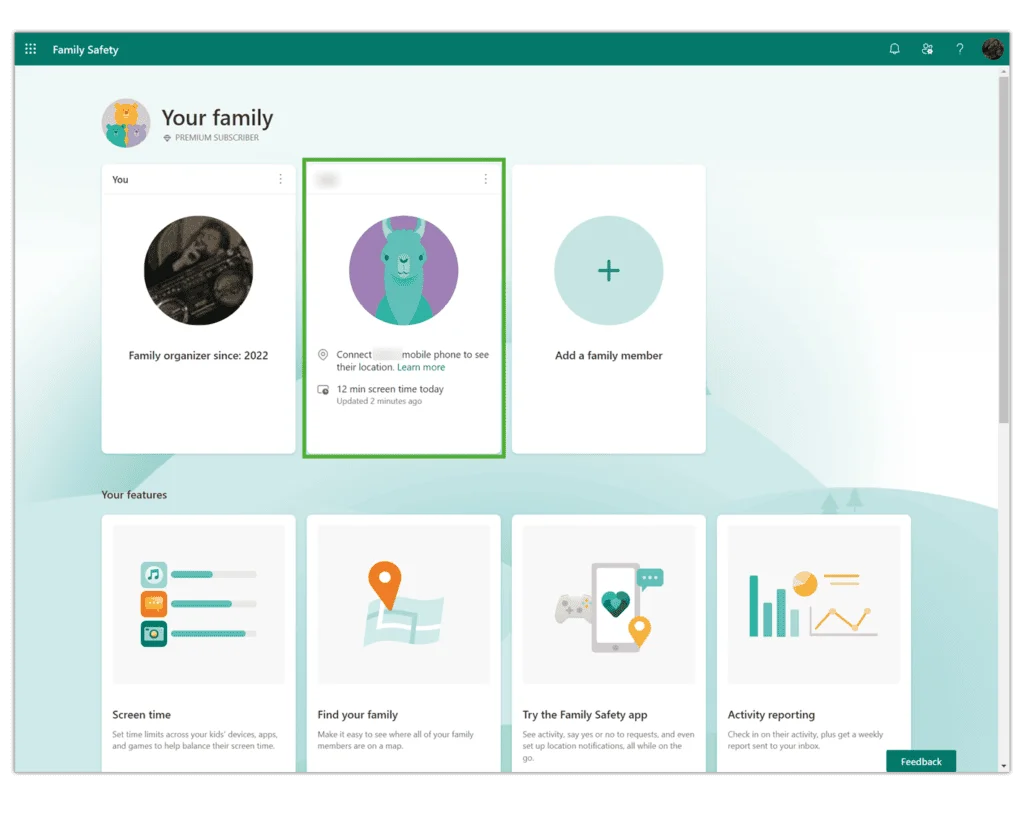
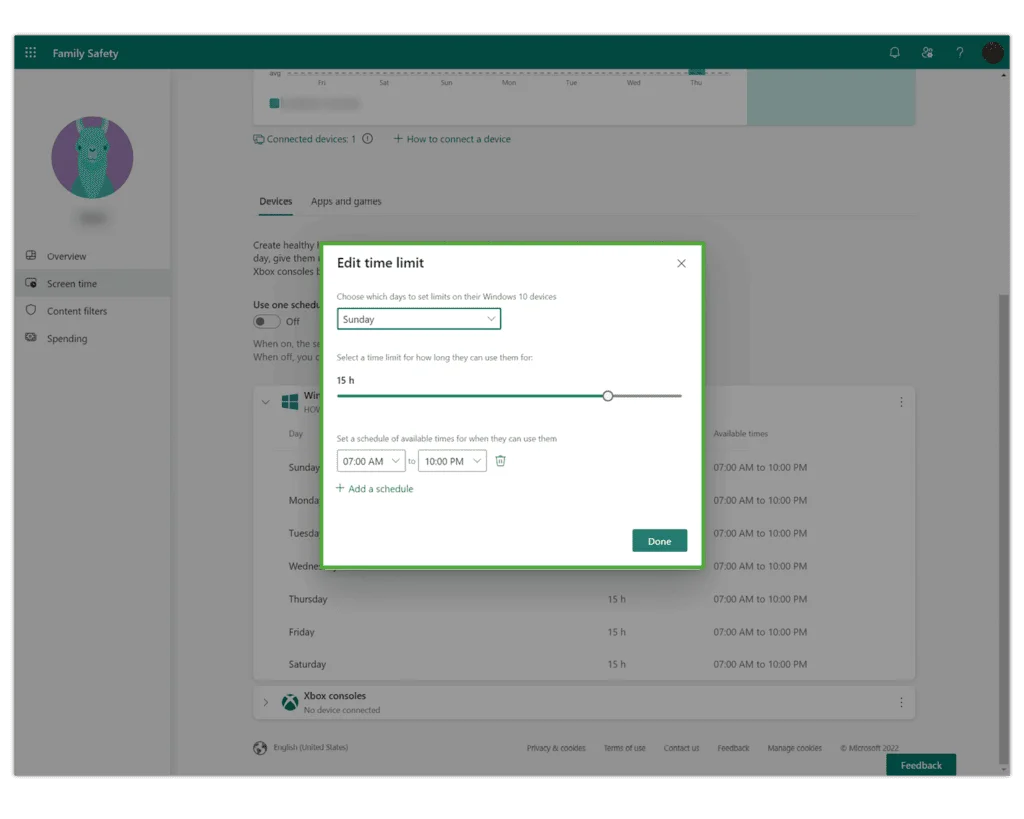
Step 3 – Here, you’ll see a breakdown of time spent on each device your child uses along with how that time is split among Apps and games. Scroll down and click Turn limits on to set screen time limits.
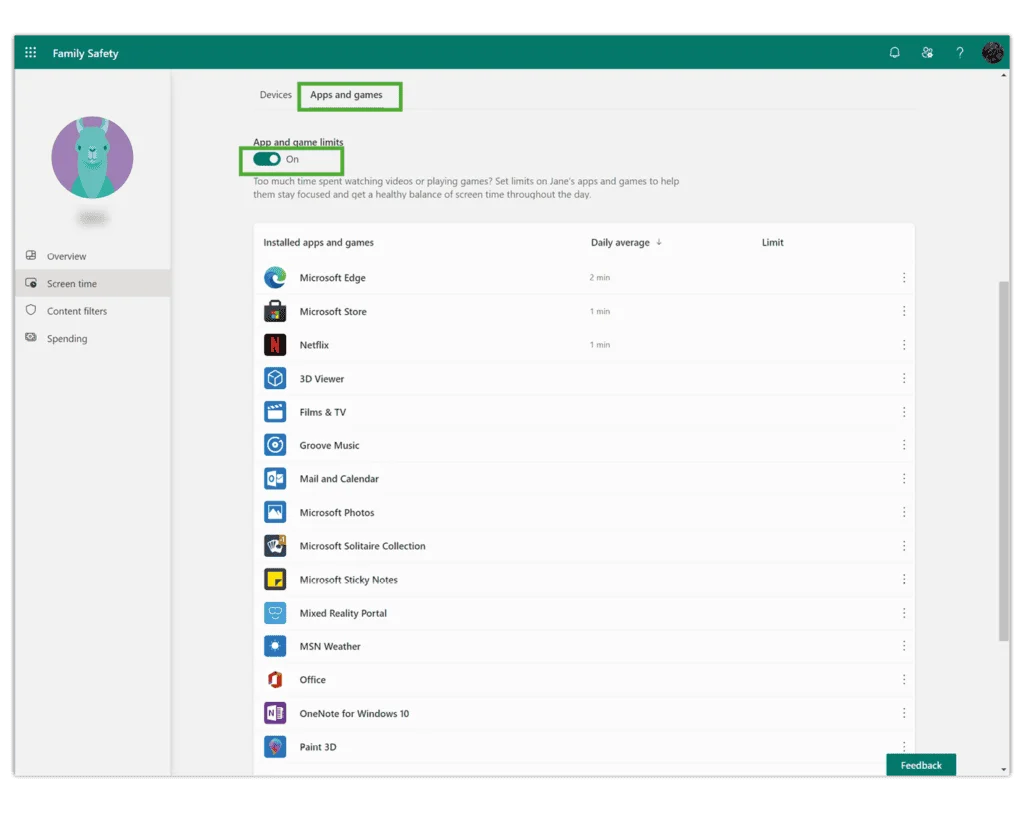
Step 4 – Choose and set how much time your child can spend on their devices or in specific apps and games per day. This is useful if you’d like to give them more time on weekends versus school nights. Review this around school breaks if relevant.
Set age filters
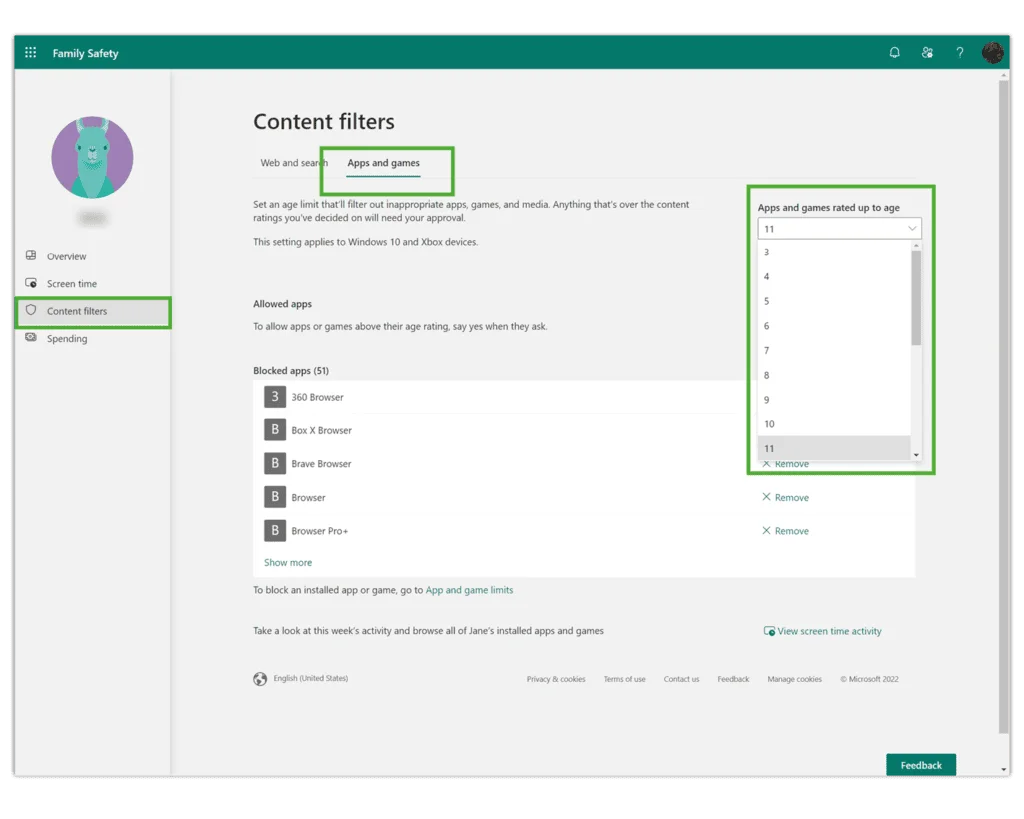
Setting age limits on Windows 11 can filter out age-inappropriate apps, games and media. These settings apply to both Windows 11 and Xbox devices. If children try to access content beyond the age limit, you will need to approve it.
To set up age filters:
Step 1 – From your account, search family options in the centre search bar. Click Family options.
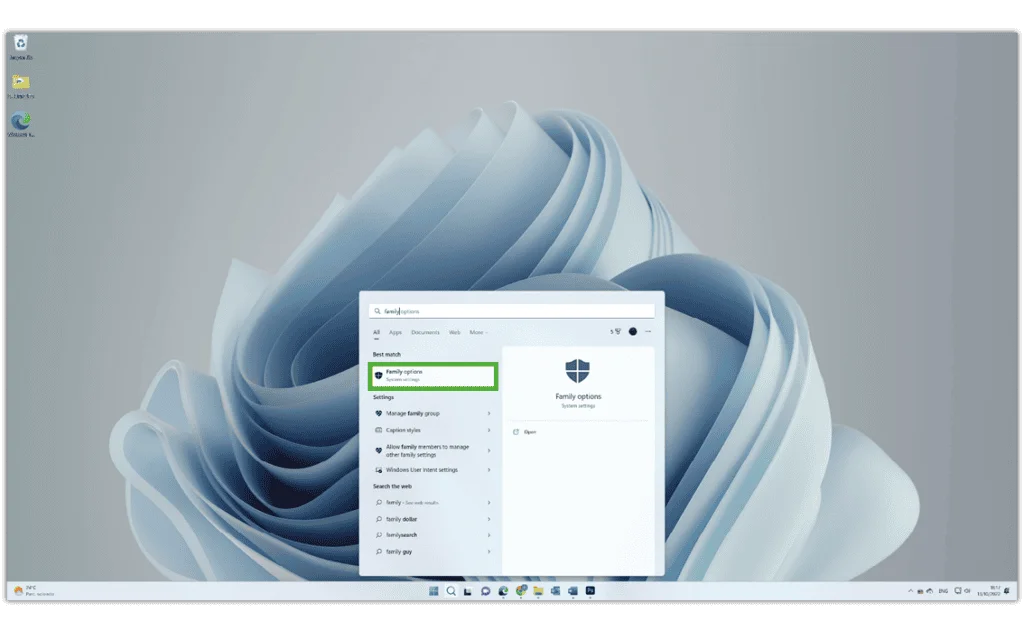
Step 2 – Click View family settings and click on your child’s profile. Click Content filters from the left-hand menu.
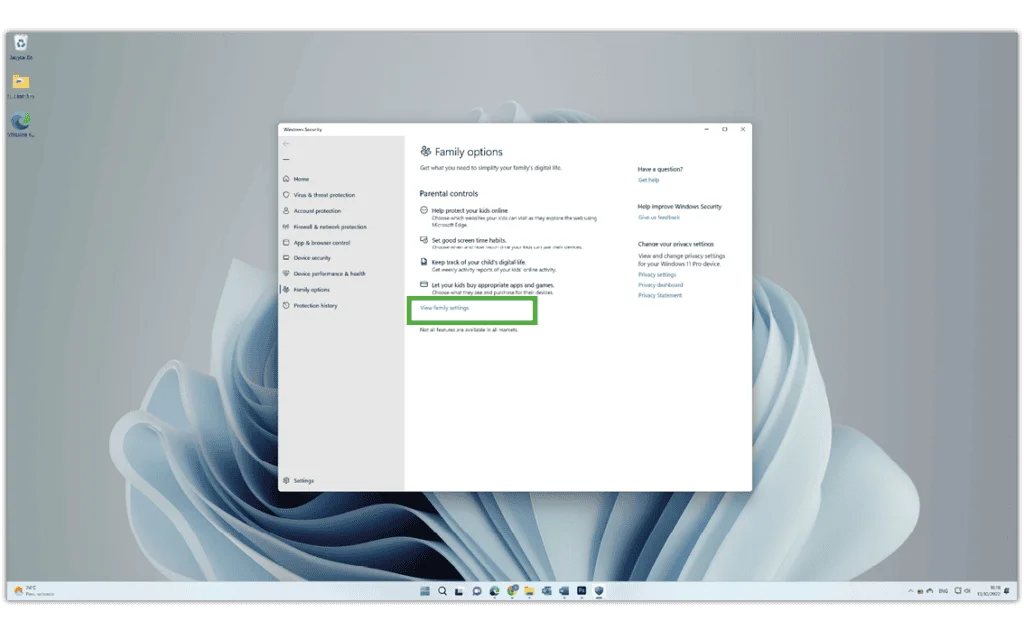
Step 3 – Select up to which age your child can access content for in the right-hand dropdown menu.
How to monitor search activity
To help you catch anything troubling or to help you start important conversations, you can monitor search activity with Windows 10 settings.
To review search activity:
Step 1 – From your account, search family options in the centre search bar. Click Family options.
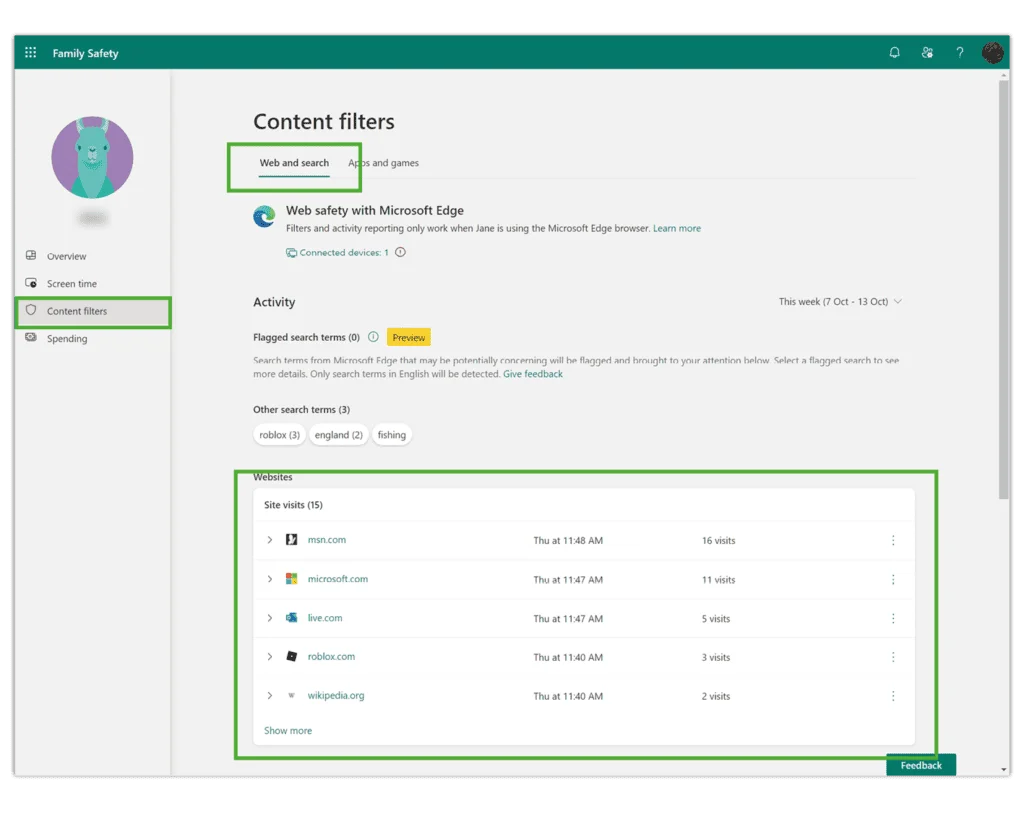
Step 2 – Click View family settings and click on your child’s profile. From the Overview tab, scroll down.
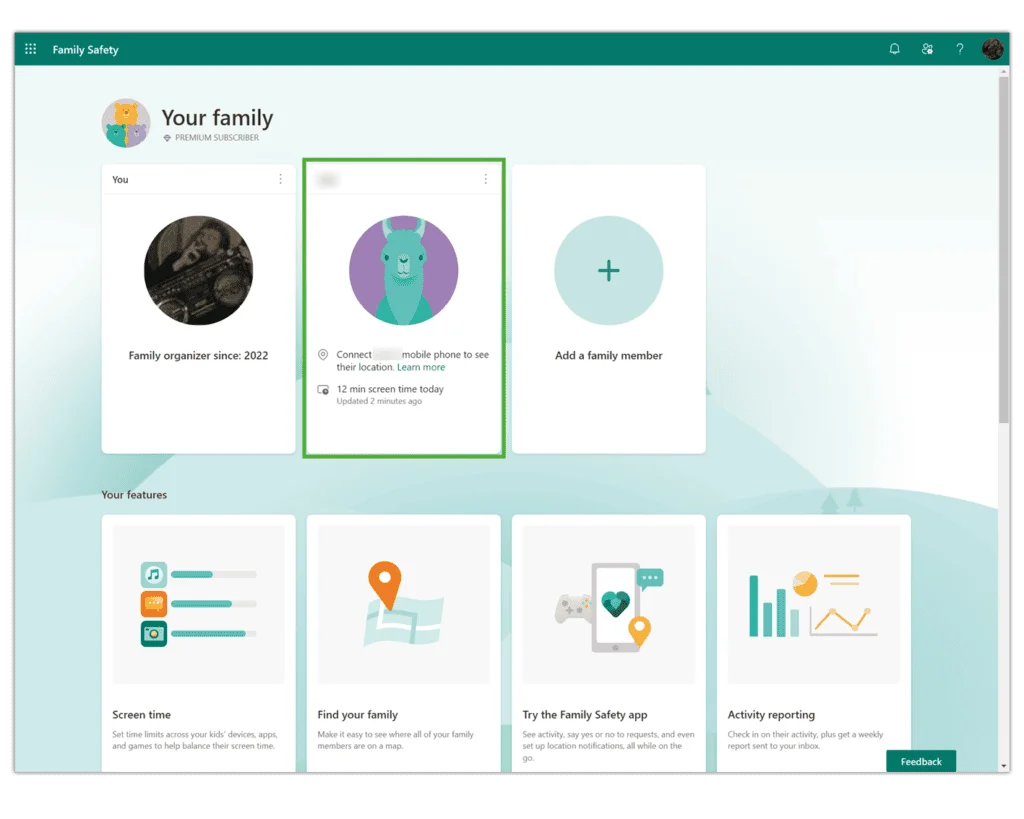
Step 3 – Click on Web and search. Here, you can see potentially harmful search terms and which sites are visited with Microsoft Edge.
Where to block unwanted and inappropriate content
Depending on your child’s age, you may want to block their access to certain content. Windows 11 allows you to do that through Family settings.
To block content:
Step 1 – From Family settings, choose your child’s profile and click on Content filters in the left-hand menu. Then, select the Apps and games tab.
Step 2 – Add apps that you’d like to block to the list. Browsers other than Edge can be blocked to ensure they can’t access content that is blocked on Microsoft Edge elsewhere.
Microsoft Family Safety app
For ease of use, Microsoft created the Family Safety app, which can be used with Windows 11 and across devices.
To set up Family Safety:
Step 1 – Download and install the app on all devices you want to include. It’s free unless you want additional features like location and driving alerts.
Step 2 – Sign in to each device using your family members’ Microsoft details. Then, you’ll be able to monitor activity across devices and use the same features outlined in the instructions above.

How to set parental controls on Windows 11
View more guides
Discover more parental controls to manage children’s devices, apps and platforms for safer online experiences.
