Video guide
 Close video
How to set parental controls on the Xbox Network
You will need the Xbox Family Settings app.
How to set up Privacy Settings
How to set up Privacy Settings
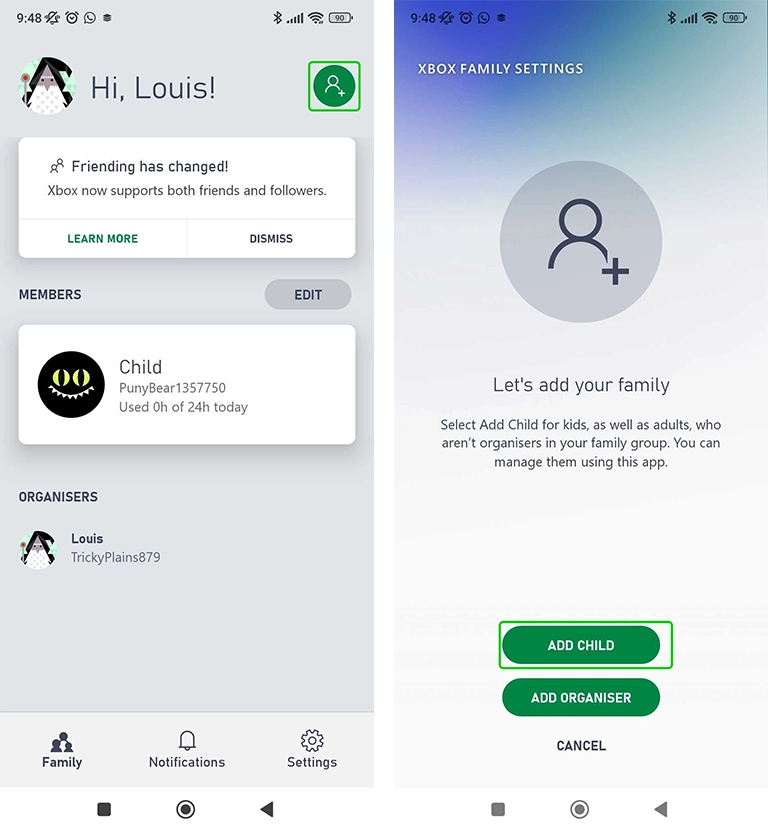
Step 1 – Open the Xbox Family Settings app and sign in.
Step 2 – Once signed in, click the green button in the top right of the screen.
Step 3 – Select ADD CHILD.
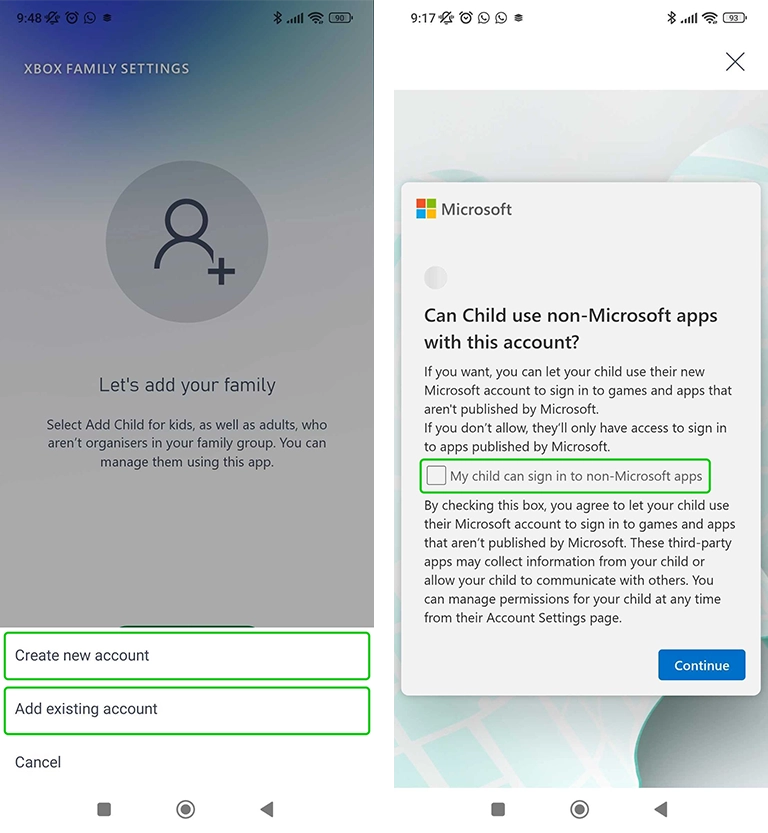
Step 4 – Choose to either Create new account for your child, or Add existing account.
Step 5 – Click the checkbox if you would like to let your child use non-Microsoft apps, or leave it unchecked if you only want your child using Microsoft apps. Then click Continue.
Step 6 – You will be asked to confirm your choice from the last page. Click the option you prefer.
Step 7 – Your child’s content restriction will be set to a level that is appropriate for the age inputted while creating your child’s account. You can change this age rating by clicking the pen icon.
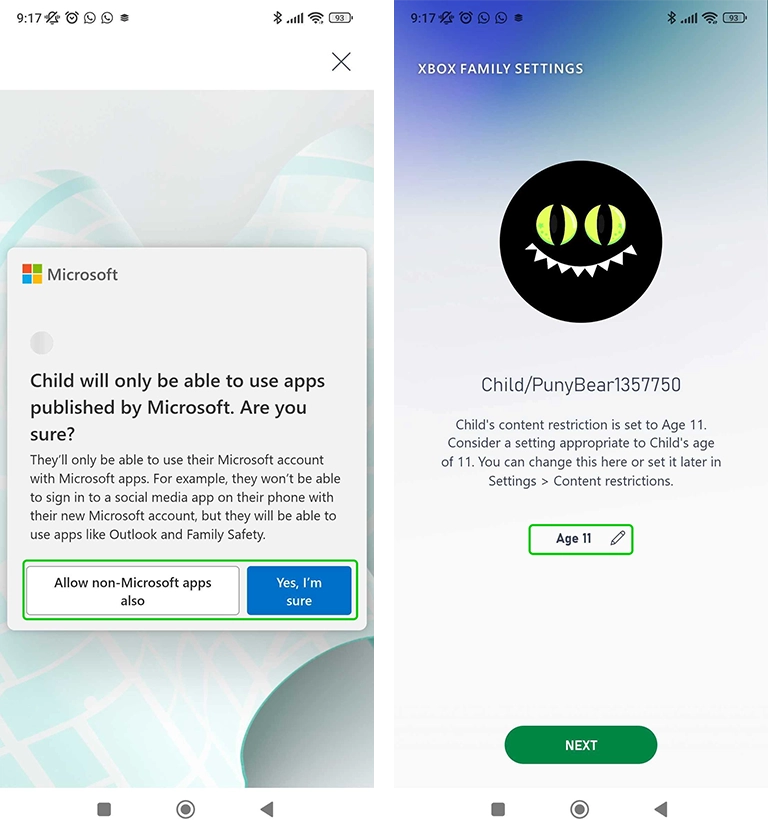
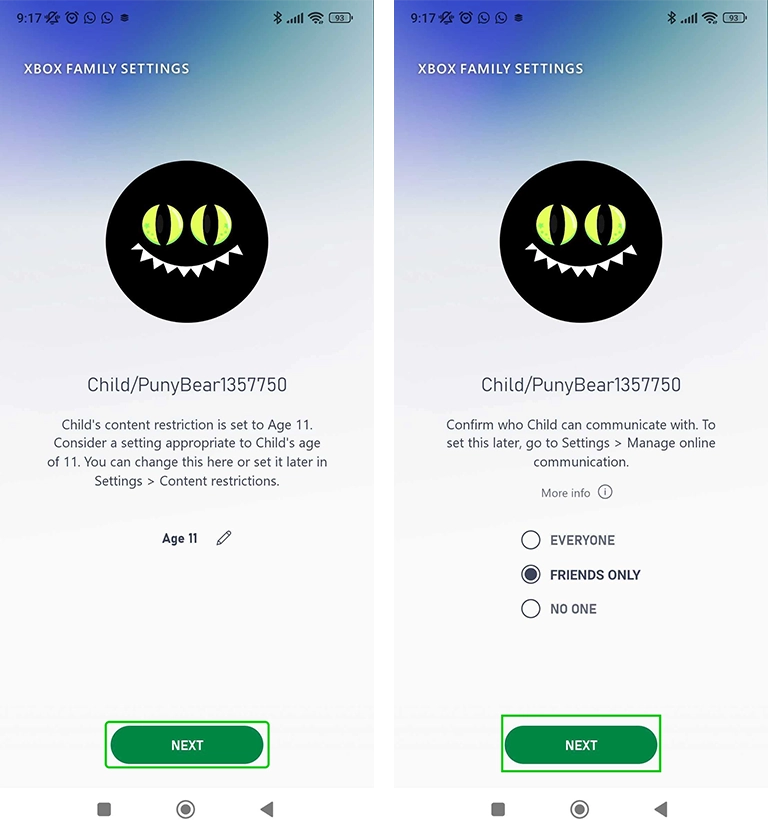
Step 8 – Once you are happy with your child’s content restriction age level, click Next.
Step 9 – Choose who you want your child to be able to contact, then click Next again.
Step 10 – Finally, choose whether to allow or block your child from playing multiplayer games. Once you have chosen, click Next.
Step 11 – Your child’s account is now finished, and will be added to your family group on the Xbox Family Settings app. Click Next to begin setting controls on your child’s account.

Managing screen time
Managing screen time
Step 1 – From the app’s homepage, select the child account that you would like to edit the controls for.
Step 2 – On the child account’s settings menu, select the screen time widget.
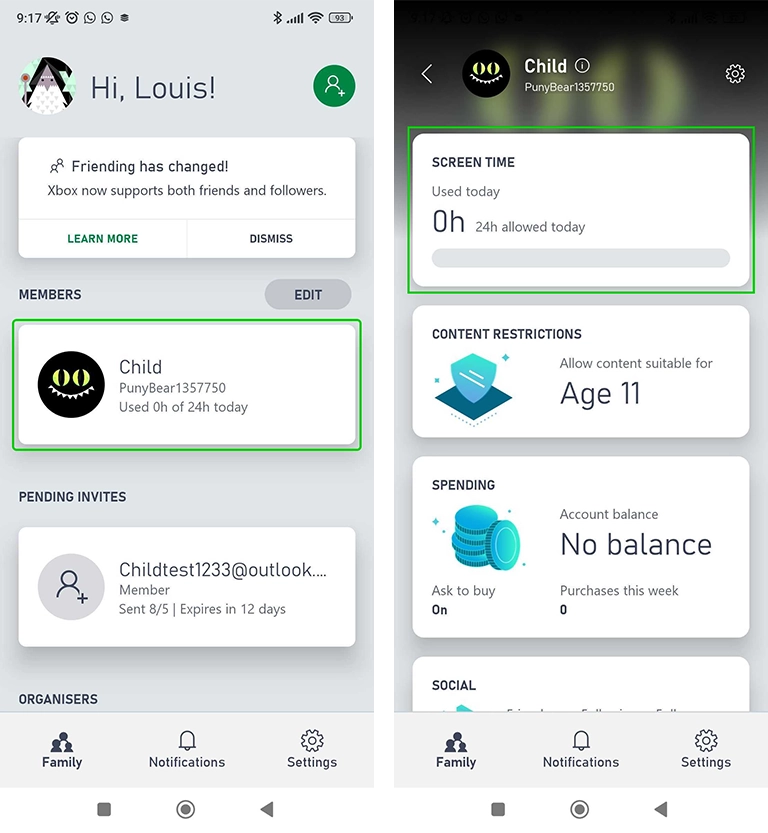
Step 3 – In the activity tab you can see how long your child has used their Xbox that day. You can click Pause to immediately restrict their access to the Xbox.
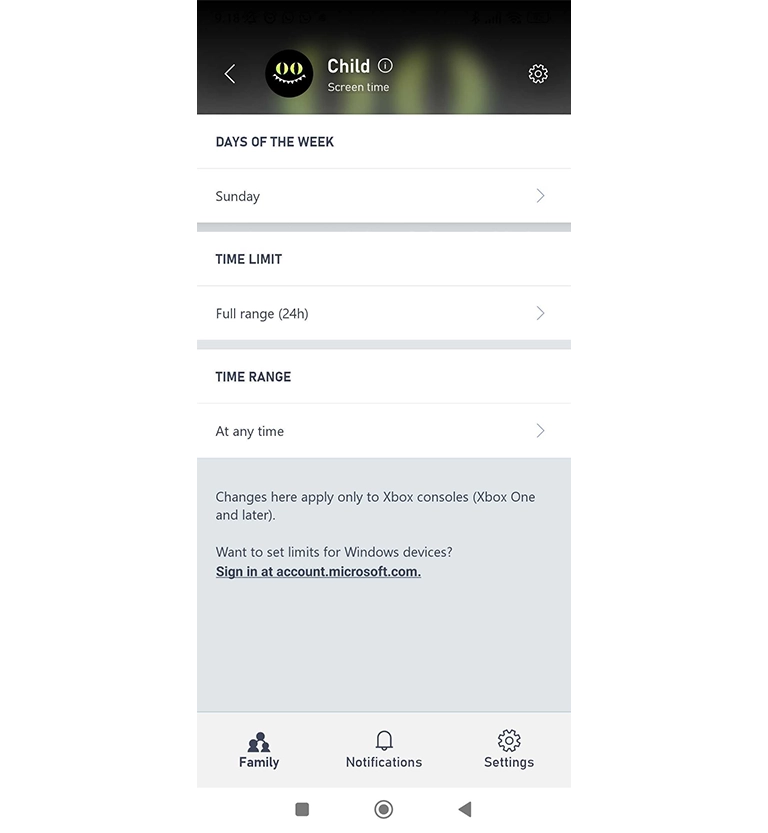
Step 4 – Under the schedule tab, you can set a daily play schedule for your child. To edit the schedule, click on one of the days.

Step 5 – Inside the schedule settings, you can choose how long your child plays that day, the time range they can play during and which days of the week this schedule applies.
Settings content restrictions
Settings content restrictions
Step 1 – From your child’s settings, select Content restrictions.
Step 2 – Inside the Content restrictions menu, select Allow content suitable for.
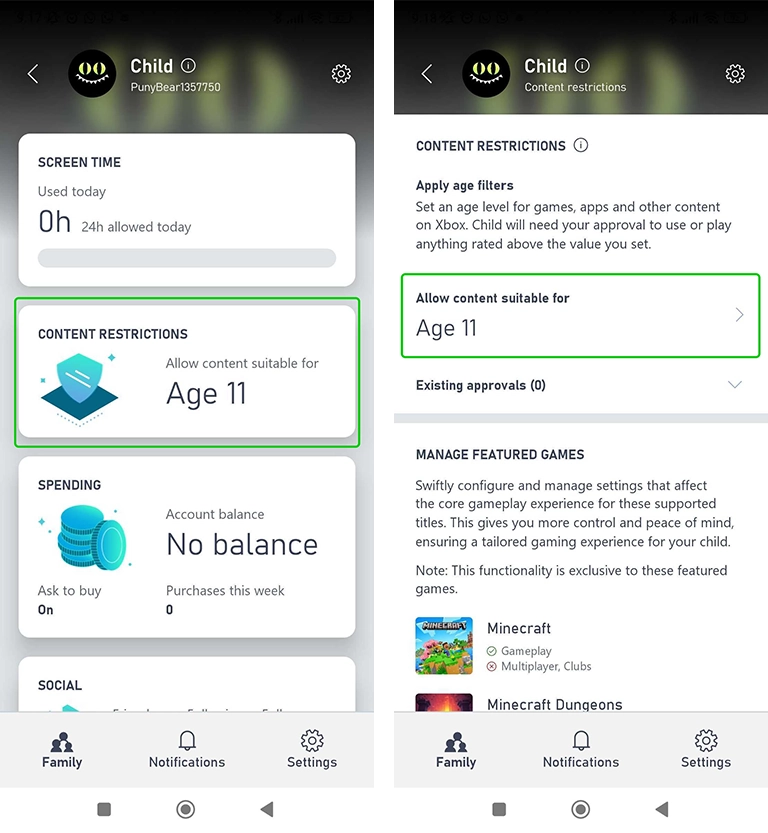
Step 3 – Here you can choose the age rating of content that you are comfortable with your child viewing. The most advisable rating is to select your child’s age.
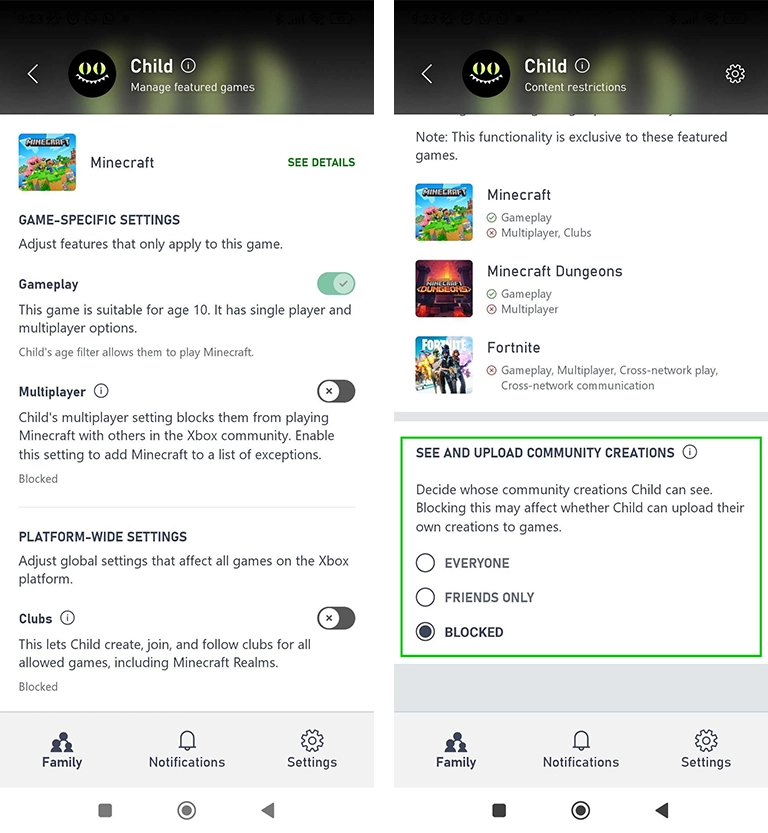
Step 4 – Under the Manage Featured Games tab, you can change the settings for specific games titles. Click on the game you’d like to edit settings for.
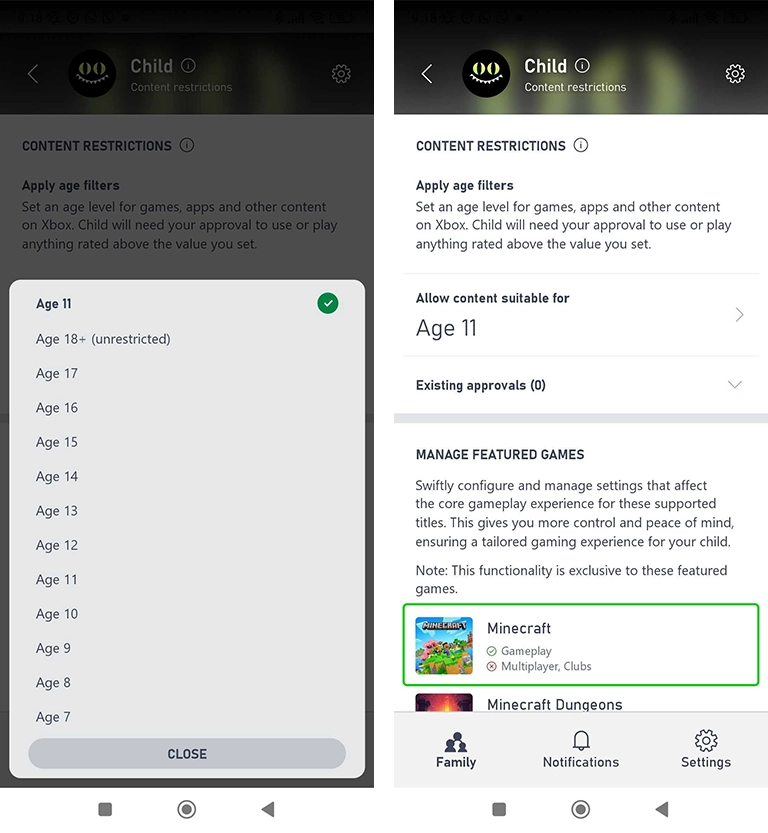
Step 5 – Settings can be toggled on and off. By default, all settings that are suitable for the age restriction you selected will be enabled, and all the ones that are unsuitable will be disabled.
Step 6 – Back on the main Content restrictions menu, you can decide whose community creations your child can see, with a choice of Everyone, Friends only or Blocked.
Editing spending settings
Editing spending settings
Step 1 – From your child’s settings, select Spending.
Step 2 – In the Spending settings, you can add money to your child’s Xbox store balance. You can also set it so your child requires your approval before making a purchase by toggling on the Ask to buy setting.
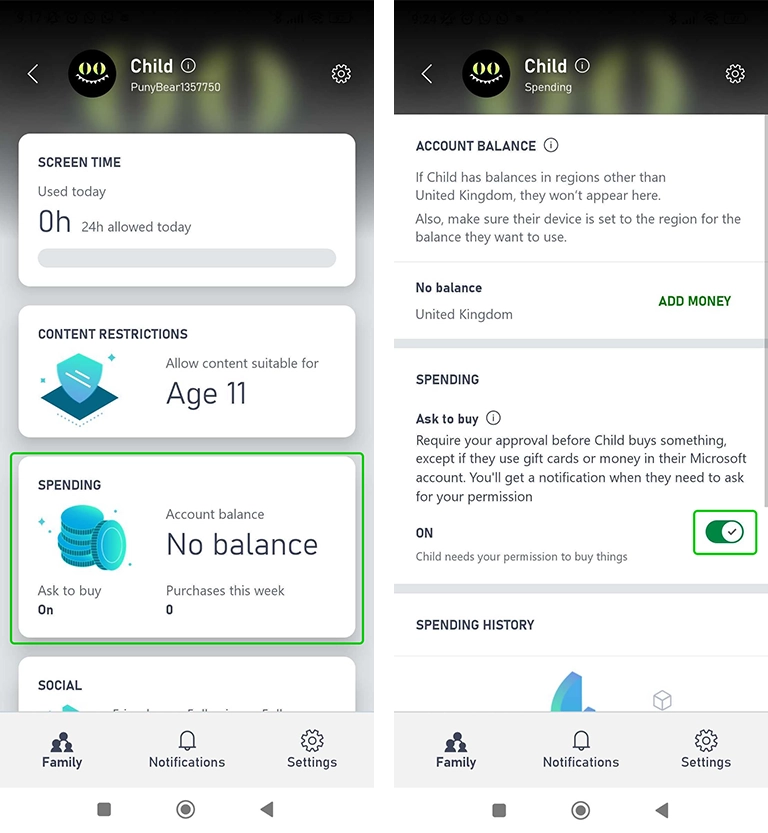
Step 3 – Scrolling down will also allow you to view your child’s spending history.

Social settings
Social settings
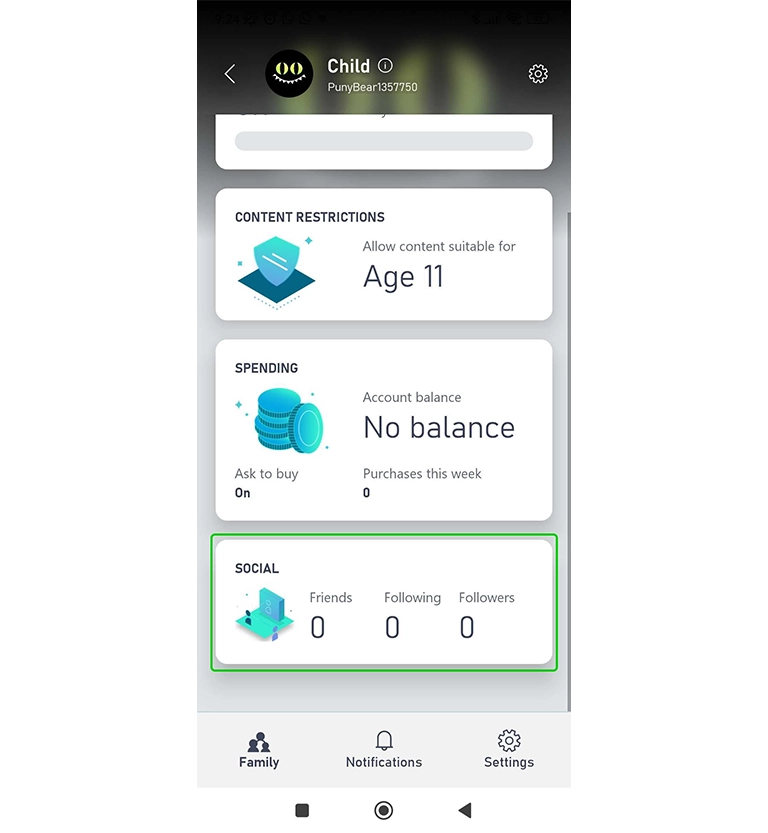
In your child’s settings, you can view how many people your child is friends with, follows or is followed by. This lets you know if your child has begun socialising with a new person on Xbox.
How to set parental controls on the Xbox Network
View more guides
Discover more parental controls to manage children’s devices, apps and platforms for safer online experiences.