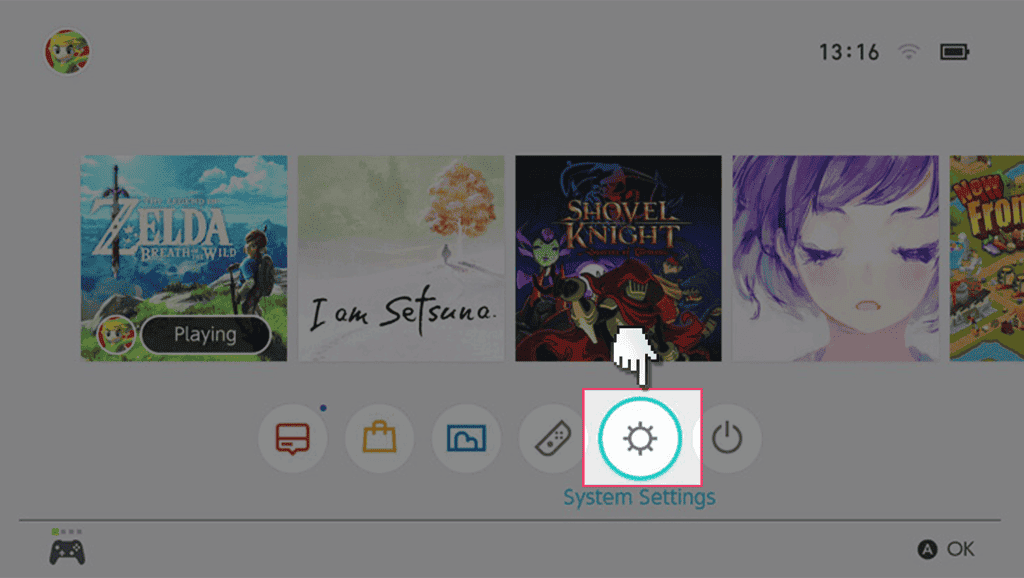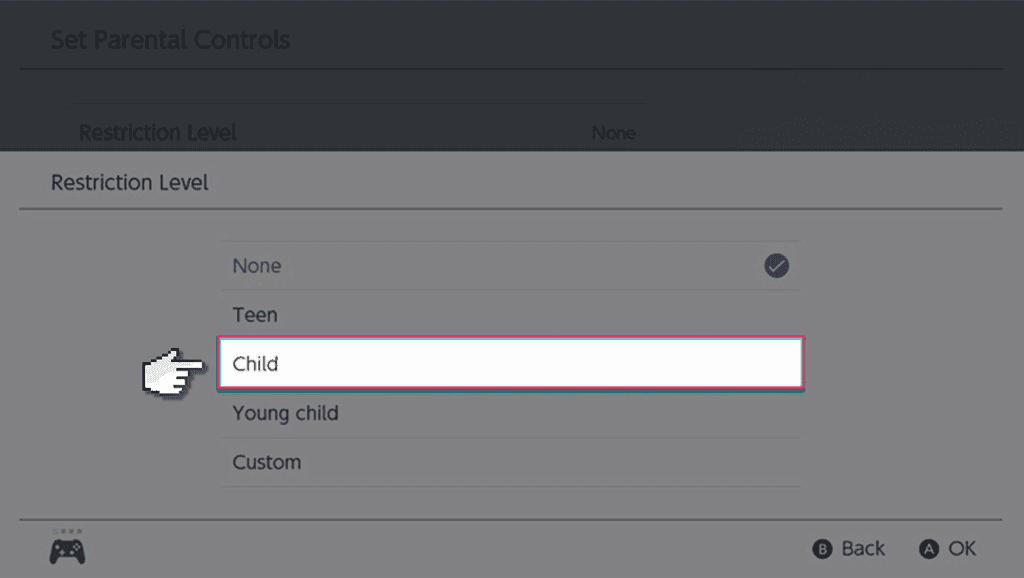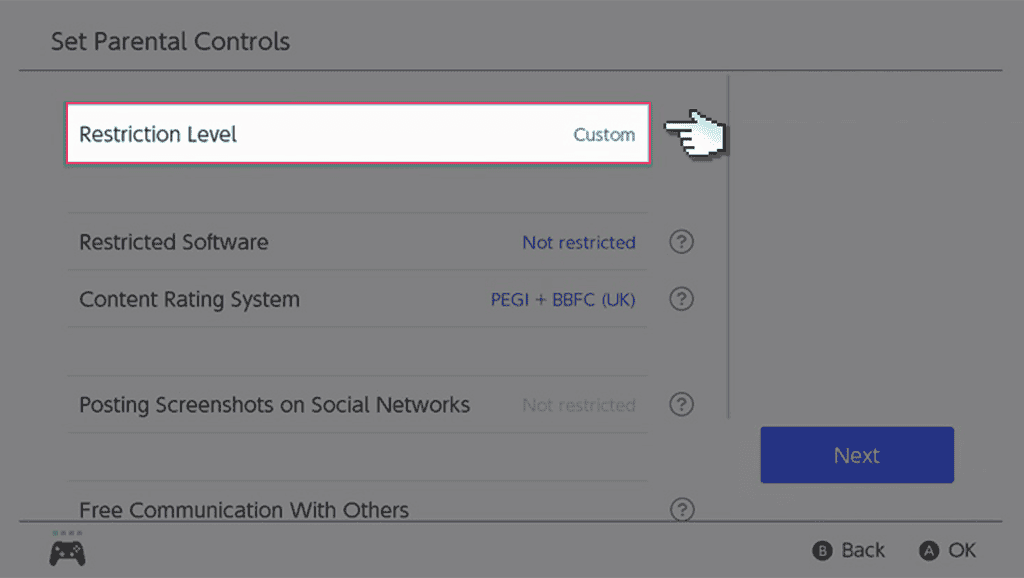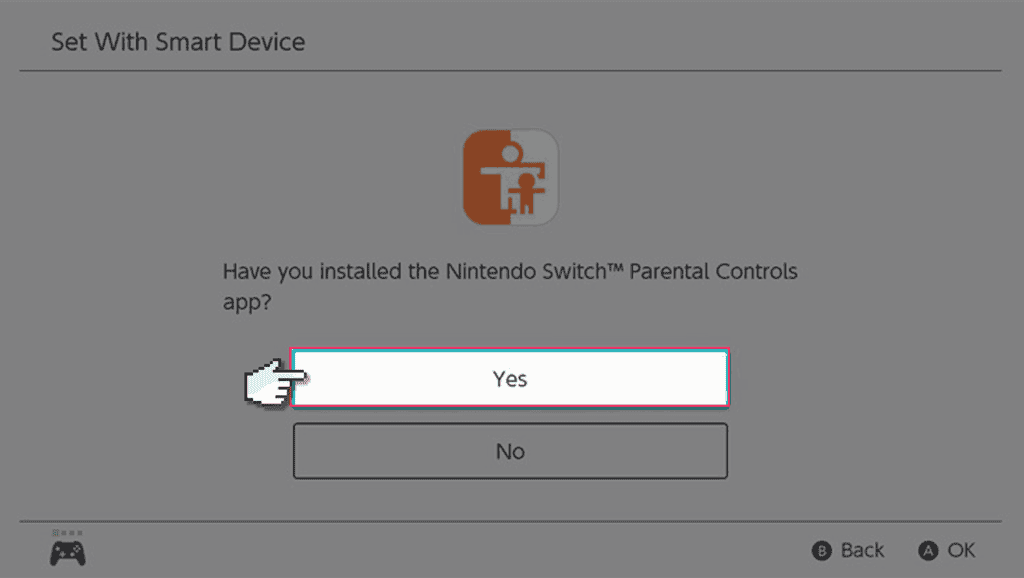

Head to the ‘System Settings’ option on the main screen, either in handheld or docked mode.
- Online Issues
- Advice by Age
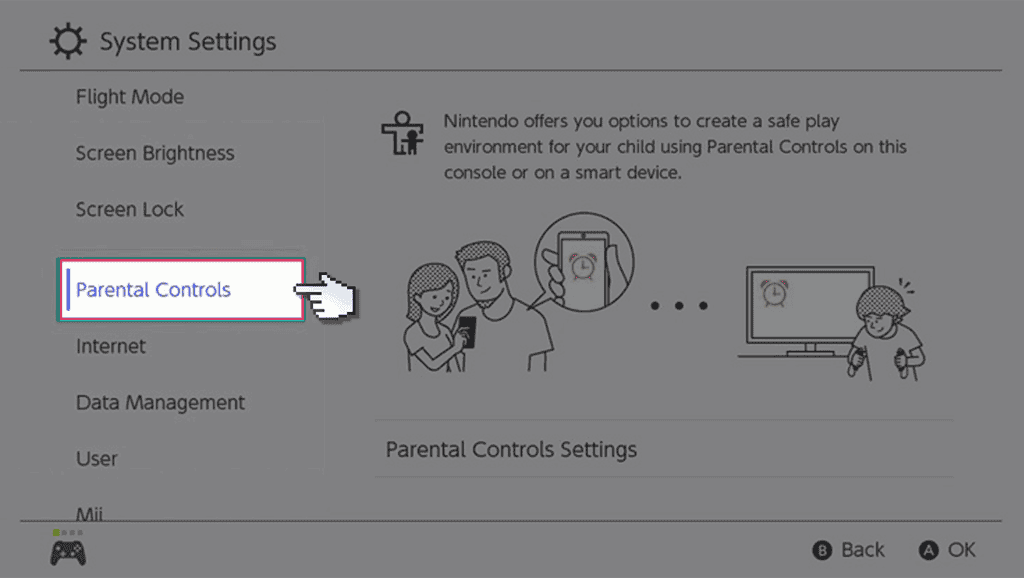
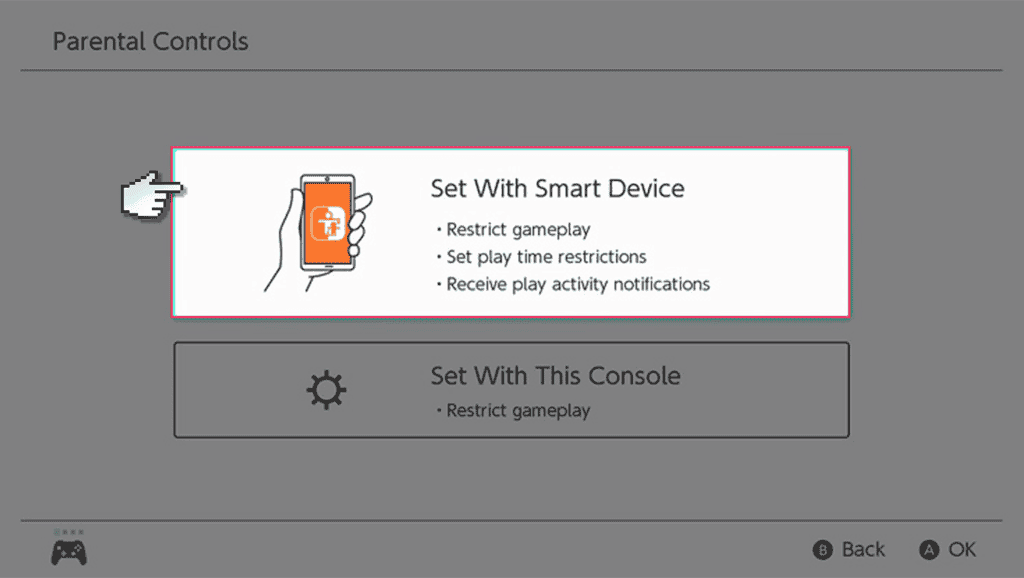
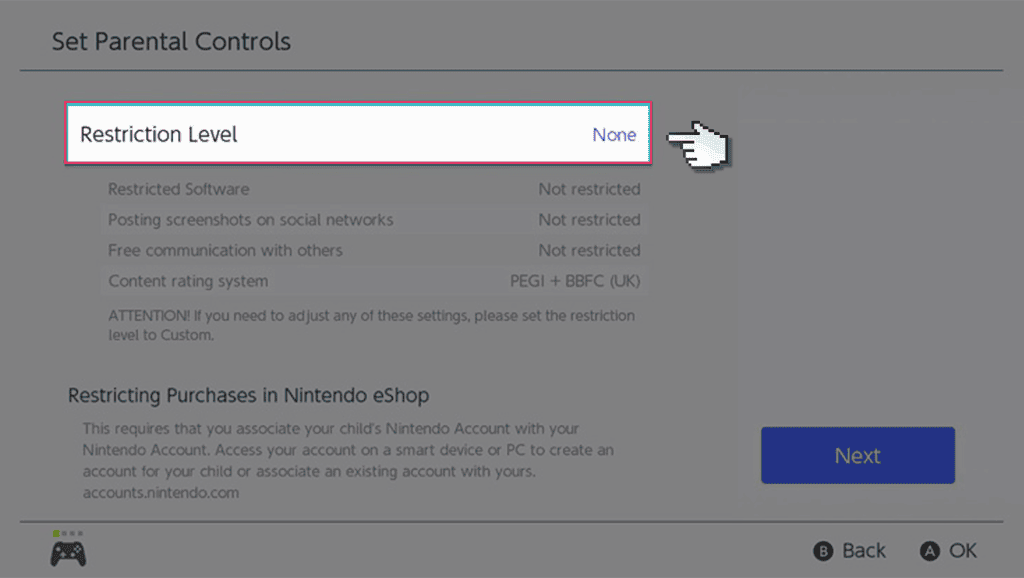
- Setting Controls
- Guides & Resources
- My Family’s Digital Toolkit
- Navigating teens’ online relationships
- Online gaming advice hub
- Social media advice hub
- Press Start for PlayStation Safety
- Guide to apps
- Digital resilience toolkit
- Online money management guide
- The dangers of digital piracy
- Guide to buying tech
- UKCIS Digital Passport
- Online safety leaflets & resources
- News & Opinion
- Schools resources